Inscape Beginner Tutorial Inner Shadow Effect
This is mixed logos by mix command in today’s tutorial, I’m going to be demonstrating how you can create this inner shadow effect using Inkscape. It creates the appearance that is if like this shape is kind of cut into the surface and it’s casting a shadow inside of the subject here and there’s an extension within Inkscape.
I believe that will do this for you but the way I’m going to show you today is it’s going to be a manual way of doing things work which will give you far more control over the outcome. you’ll be able to determine which direction the shadow effect goes how transparent.
It is or how it helps blurt it is as you see here so the way I’m going to show you it’s not too difficult and it gives you a lot more control over the outcome of the design.
So let’s get started here with Inkscape by the way if you’d like to know how you can make Inkscape appear to darken with these custom icons I’ll have a link to that information in the description of the video.
So let’s go ahead and set up our document we’ll go to file document properties and I’m going to change the display units to px for pixels and I’m just going to turn off the page border show the page border uncheck that closeout and we’ll go to view.
We’re going to want custom selected and then we’ll zoom in at 1 to 1 open up the align and distribute menu with this button up here and you’re going to want last selected chosen from this drop-down and then we’ll open up the Edit objects colours gradients and Stroke menu with that button there.
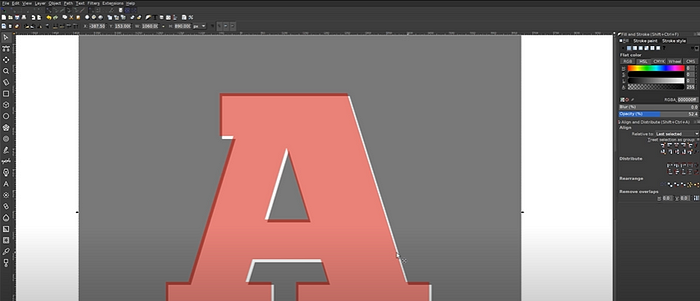
So for this tutorial I’m just going to use letters I’m just going to use like the letter A instead of using here looking the thumbnail I use the Inkscape logo. I’ll just use the letter A I’m just going to grab the text tool click on the canvas and I’m going to use a capital A.

we go to the scale the Select tool and hold ctrl and grab this arrow to scale this up and I’m going to use a different font for this. I’m going to use the font it’s called I just click the text button up here the font is called chunk 5 you could use any font you’d like.
But I would suggest using a heavyweight font that’s pretty thick and has a lot of like you don’t want to use a really in font otherwise there’s really no room for you to see the shadow.
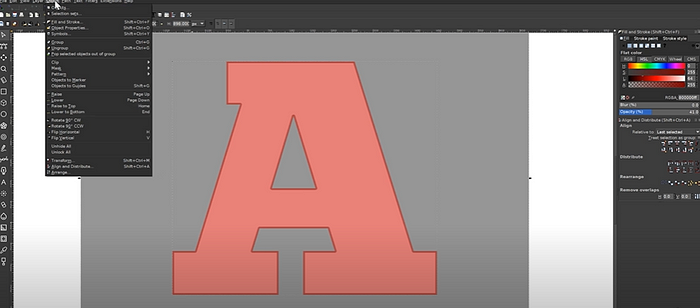
So in order for this to work, we’re going to have to change this from a text object to just a pure path and in order to do that.
We’re going to pass an object to the path and now that’s no longer a text object that we can edit and now we’ll just click the ungroup button as well.
So that’s, now if you go to the edit pad by noticeable you’ll see these individual nodes here that are now about half. So what we’re going to do now is when we go back to the Select tool.
I’m going to make this I’m going to make this a colour that’s slightly darker than the background that it’s on so like a really light shade of grey and maybe I’ll make this a little darker.
So you can see it better under the fill tab and under the HSL tab you could adjust the L column over here to adjust it to your liking I think that’s pretty good right there and what I’m going to do.
Now is I’m going to grab the squares and rectangles tool and I’m going to click and drag and create a rectangle going over that object and I’m going to make that black and I’m going to take the opacity of that and bring that down about in half and I’ll go to the Select tool.
I’m going to click and drag over all of this and I want to Center it up on the vertical axis and on the horizontal axis. Then I’m going to hold shift and click on the black rectangle to deselect that and we’re just going to have the object.

Here is the letter A selected and with that selected. I want to duplicate that by hitting ctrl D on the keyboard and then I’ll hold shift on the keyboard with that selected and then click on the rectangle again and go to path difference. So now we have that rectangle with the shape of the letter.
A punched through it like that and what I’m going to do. Now is I’m going to click on this letter A and I’m going to duplicate that again by hitting ctrl D on the keyboard and I want to make this copyread and I’ll just bring the opacity of this down about less than 50% maybe 40% like that and I’m going to take this black rectangle right here.
This black rectangle is going to represent it that’s going to be the object that represents the inner shadow here. So what I’m going to do is I’m going to zoom in on this a little bit by holding ctrl and rolling up the mouse.
Now I’m going to click and drag this down to the right a little bit and if you notice where the black area intersects with the red area that’s where the shadow is going to be so if you want your shadow to be going from the top left to the down to the bottom right like it is here then place the object.
Here if you want it going the other way move it over here or you just move it over there like that for this tutorial I’m going to move it down into the right like this and once I’ve done that I’m going to hold shift and click on the letter A.
So we have the rectangle and the letter A selected and go to object click set and what we can do now is we could bring the opacity of that up and come over to the blur tool and just click upon that to give that a little bit of a blur and you’ll see that we have a shadow in there now and for this, I’m using a one-point Picture shadow maker.
I’m going to bring the opacity of that down a little bit and let me zoom out a little bit by holding ctrl or rolling down the mouse wheel and then you’ll see we have our inward shadow set.
Now let me show you another way you can alter this I’m going to click on the shadow object make sure you click on the shadow object itself and not the actual letter A. You’ll know this by this stripe down here in the bottom left corner.
It’ll be the colour of the objects like this a is a light grey you’ll see here in the bottom left it’s a light grey if I click on the actual shadow. It’ll turn that little stripe will be black so once I have that black stripe this object selected.
I’ll go to object clip release and then I’ll click off that to deselect everything and what I’m going to do now is take this object. I’m going to get rid of the blur by bringing that back down to zero and then I’ll hold shift and click on the letter A and just Center it up on the vertical and horizontal axis again.
So it’s lined up and then I’ll hold shift and click the letter A again to deselect it and what I’m going to do now is I’m going to give this black rectangle an outline otherwise known as a stroke so to do that. I’ll hold shift and click on the colour black and it’s going to put an outline going around the rectangle and as you can see it bleeds into the red area of the letter A and once we’ve done that we could hold shift-click the letter A and go to object.
Click set and give this a blur as well and as you can see what that did there is that put the shadow everywhere within the letter A instead of just coming in from one direction like that. But if you wanted to come in from a direction, you just do it how I previously did it so that’s how you can create something like that using Inkscape. So if you have any questions?
